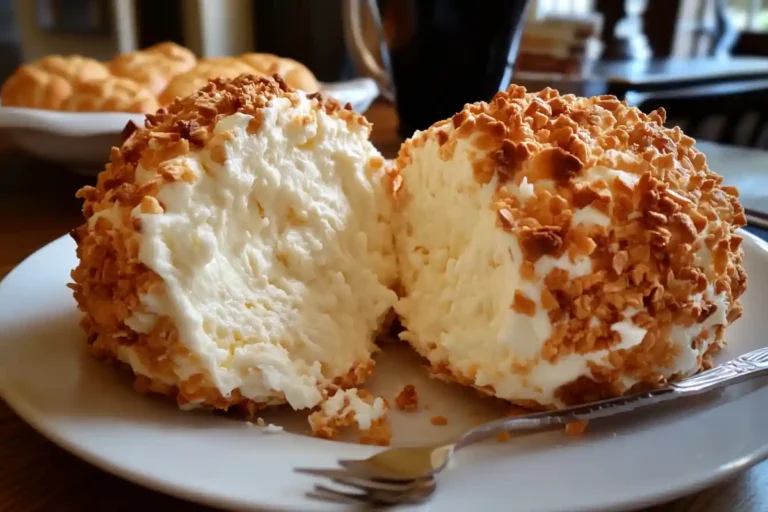
Cheesecake balls are the ultimate dessert that combines the rich creaminess of cheesecake with the fun, shareable nature of a party platter. Whether you’re hosting a festive gathering, attending a potluck, or just indulging in a sweet treat, this cheesecake ball recipe is sure to wow your guests. Easy to make, endlessly customizable, and absolutely delicious, it’s a dessert you’ll want to add to your repertoire. In this guide, we’ll walk you through everything you need to know—from selecting the perfect ingredients to mastering the presentation. Let’s get started!
Table of Contents
Why You’ll Love This Cheesecake Ball Recipe
A Party-Perfect Dessert
The cheesecake ball is the perfect centerpiece for any dessert table. Its beautiful presentation is matched by its rich flavor, making it ideal for parties, holidays, and even casual get-togethers. Guests can dip crackers, cookies, or fruits directly into the cheesecake ball, adding an interactive and fun element to your dessert spread.
Kid-Friendly and Crowd-Pleasing
This dessert is loved by all ages. Kids adore its playful nature and sweet flavor, while adults appreciate its sophisticated presentation. Plus, you can customize it to fit the preferences of your crowd—add chocolate chips for a decadent twist or coat it in festive sprinkles for a holiday vibe.
Ingredients for the Cheesecake Ball Recipe
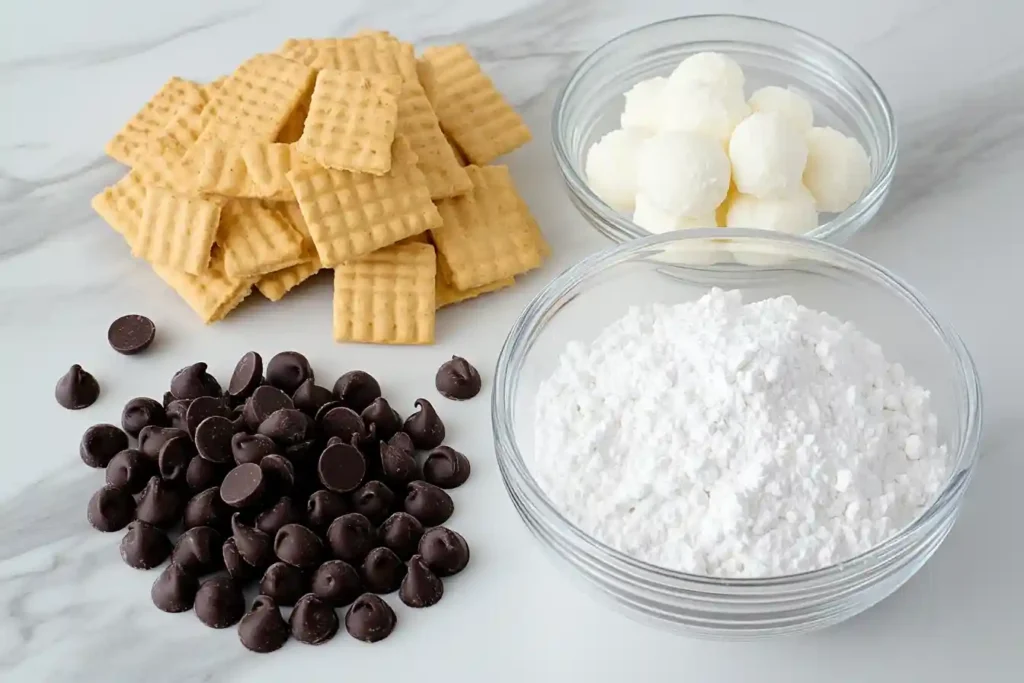
Table: Ingredients and Substitutions
| Ingredient | Quantity | Possible Substitutions |
|---|---|---|
| Cream Cheese | 2 blocks (16 oz) | Low-fat cream cheese for a lighter option |
| Powdered Sugar | 1 cup | Stevia or monk fruit sweetener for low-sugar |
| Vanilla Extract | 1 tsp | Almond or citrus extract for added flavor |
| Mini Chocolate Chips | ½ cup | White chocolate chips or butterscotch chips |
| Crushed Graham Crackers | 1 cup | Crushed cookies, nuts, or sprinkles |
| Butter (optional) | 2 tbsp | Margarine or coconut oil as alternatives |
Tips for Choosing the Best Ingredients
- Cream Cheese: Use full-fat cream cheese for the richest texture and flavor. For a healthier twist, opt for a reduced-fat version. Avoid whipped cream cheese, as it can alter the consistency.
- Sweetener: Powdered sugar works best for a smooth, lump-free texture. If you’re reducing sugar, ensure the alternative sweetener dissolves well.
- Coatings: Choose coatings that complement the cheesecake flavor. Crushed graham crackers are classic, but you can experiment with sprinkles, nuts, or crushed pretzels for a salty-sweet combo.
How to Make the Perfect Cheesecake Ball
Step 1: Preparing the Cheesecake Mixture
- Soften the Cream Cheese:
Start by allowing the cream cheese to sit at room temperature for about 30 minutes. This ensures it’s soft enough to mix easily, preventing lumps in your mixture. - Combine the Ingredients:
- In a large mixing bowl, beat the cream cheese with an electric mixer until smooth and creamy.
- Add the powdered sugar and vanilla extract, mixing until fully incorporated.
- Fold in the mini chocolate chips (or your preferred mix-ins) using a spatula. Avoid over-mixing to maintain a fluffy texture.
Pro Tip: If you’re using a stand mixer, start at low speed to avoid powdered sugar clouds in your kitchen!
Bonus Tip: Infuse Unique Flavors
Want to wow your guests? Mix in flavor extracts like caramel, peppermint, or coffee for a one-of-a-kind twist. You can even split the mixture into two and flavor each half differently for variety!
Step 2: Shaping the Cheesecake Ball
- Chill the Mixture:
Transfer the cheesecake mixture onto a sheet of plastic wrap. Gather the edges of the wrap and gently shape the mixture into a ball. Refrigerate for at least 2 hours, or until firm. - Fine-Tuning the Shape:
Once chilled, remove the ball from the refrigerator and adjust the shape if needed. The mixture should now hold its form well, making it easy to handle.
Pro Tip: If the mixture feels too sticky to shape, refrigerate for an additional 30 minutes or lightly coat your hands with powdered sugar.
Step 3: Coating the Cheesecake Ball
- Prepare Your Coating:
Spread your chosen coating (crushed graham crackers, nuts, or sprinkles) on a large plate or shallow dish. - Roll the Cheesecake Ball:
Unwrap the chilled cheesecake ball and gently roll it in the coating, pressing lightly to ensure an even layer. Rotate the ball as needed to cover all sides completely.
Pro Tip: For a multi-layered look, use two or three coatings (e.g., start with crushed cookies and finish with sprinkles).
Step 4: Serving Suggestions
- Prepare the Platter:
Place the cheesecake ball in the center of a decorative serving platter. Surround it with dippers such as graham crackers, vanilla wafers, fresh fruit slices, or pretzel sticks. - Add Garnishes:
Sprinkle extra toppings around the ball for a polished presentation. You can also drizzle chocolate or caramel sauce over the top for added visual appeal. - Serving Method Options:
- Slice the cheesecake ball into wedges for easy serving.
- Allow guests to dip directly for a casual and interactive experience.
Pro Tip: Keep the cheesecake ball chilled until just before serving to maintain its shape and texture.
Tips and Tricks for Success
Avoiding Common Pitfalls
- Preventing a Lumpy Mixture: Ensure the cream cheese is fully softened before mixing. Beat it thoroughly before adding other ingredients.
- Avoiding an Overly Soft Cheesecake Ball: Chill the mixture for the recommended time or longer if needed. If the mixture still feels too soft, add a bit more powdered sugar to firm it up.
Enhancing the Flavor
- Experiment with different extracts like almond, coconut, or lemon for unique flavor profiles.
- Mix-ins like dried fruit, toffee bits, or crushed Oreos can elevate the cheesecake ball’s texture and taste.
Bonus: Creative Serving Themes
- Holiday Themes: Add red and green sprinkles for Christmas or pastel colors for Easter.
- Kids’ Parties: Use rainbow sprinkles or mini M&Ms as a coating.
- Elegant Dinners: Opt for crushed
- nuts or dark chocolate shavings for a sophisticated touch.
With these steps and tips, your cheesecake ball will be the talk of the table. It’s a dessert that combines creativity, flavor, and presentation to leave a lasting impression on your guests.
Creative Variations to Try
One of the best aspects of this cheesecake ball recipe is its adaptability. It’s not just a dessert—it’s an experience you can tailor to your preferences and the occasion. Whether you’re creating something chocolatey, fruity, or even savory, these creative variations will elevate your cheesecake ball game.
Chocolate Lover’s Cheesecake Ball
If you love chocolate, this dessert cheese ball is your dream come true.
- Flavor Boosters:
Add 2–3 tablespoons of cocoa powder to the cheesecake mixture for a chocolate base. To make it even more decadent, fold in chocolate chips, either milk or dark chocolate, depending on your preference. - Coating Ideas:
Roll the cheesecake ball in crushed chocolate cookies, cocoa powder, or chocolate sprinkles for extra indulgence. You can also drizzle melted chocolate over the coated ball to make it even more irresistible. - Pairing Tip:
Serve this version with chocolate-dipped pretzels or strawberries. If you’re planning a dessert spread, complement it with our Carrot Cake Recipe for variety.
Cheesecake Ball Recipe
Ingredients
- 16 oz 2 blocks cream cheese, softened
- 1 cup powdered sugar or substitute with stevia/monk fruit for low sugar
- 1 teaspoon vanilla extract or swap with almond/caramel extract for variety
- ½ cup mini chocolate chips or use white chocolate chips, butterscotch, or dried fruit
- 1 cup crushed graham crackers or substitute with Oreos, sprinkles, or nuts
- 2 tablespoons butter optional (adds richness but can be omitted)
- Assorted dippers: Graham crackers vanilla wafers, pretzels, fruit slices
Instructions
- Step 1: Soften the Cream Cheese

- Remove the cream cheese from the refrigerator and let it sit at room temperature for 30 minutes.
- This ensures a smooth and lump-free mixture when mixed.
- Step 2: Mix the Ingredients
- In a large mixing bowl, beat the softened cream cheese using an electric mixer until smooth and creamy.
- Add the powdered sugar and vanilla extract, then continue mixing until fully incorporated.
- Gently fold in the mini chocolate chips using a spatula or spoon.
- Step 3: Shape the Cheesecake Ball
- Lay out a large sheet of plastic wrap on a clean surface.
- Spoon the cheesecake mixture onto the center of the plastic wrap.
- Gather the edges of the wrap and shape the mixture into a ball shape.
- Wrap it tightly and refrigerate for at least 2 hours (or up to overnight) to allow it to firm up.
- Step 4: Coat the Cheesecake Ball
- Spread the crushed graham crackers (or your chosen coating) onto a flat plate.
- Remove the chilled cheesecake ball from the plastic wrap and roll it in the coating, ensuring an even layer all around.
- Lightly press the coating into the surface so it adheres well.
- Step 5: Serve and Enjoy!
- Place the cheesecake ball on a serving platter.
- Surround it with assorted dippers such as graham crackers, vanilla wafers, pretzels, or fruit slices.
- Serve immediately or refrigerate until ready to serve.
Notes
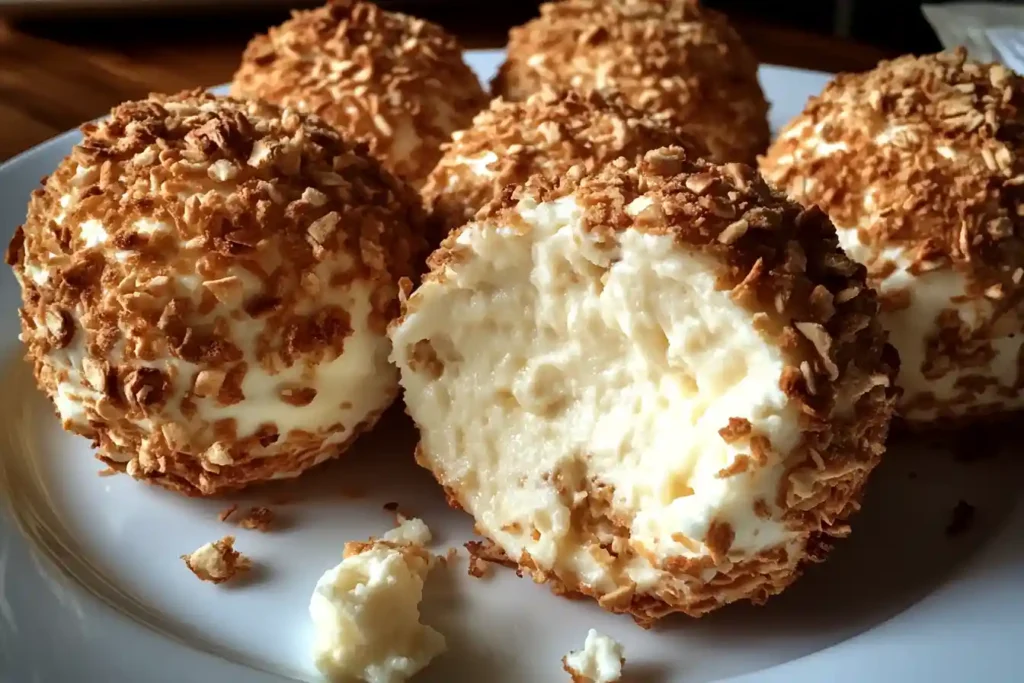
Try different coatings like coconut flakes, toffee bits, or festive sprinkles.
Make it gluten-free by using gluten-free crackers and chocolate chips.
For a healthier version, use low-fat cream cheese and natural sweeteners.
Storage: Keep in an airtight container in the fridge for up to 3 days.
Nutrition
Fruity Delight Cheesecake Ball
If you’re in the mood for something light and refreshing, try this fruity twist on the classic cheesecake ball recipe.
- Flavor Additions:
Mix in dried fruits like cranberries or chopped apricots. Alternatively, swirl in a few tablespoons of fruit preserves, such as strawberry, raspberry, or orange marmalade, to create layers of flavor. - Coating Ideas:
Use crushed freeze-dried fruit or shredded coconut for a vibrant and flavorful coating. For a visually stunning presentation, combine multiple coatings, such as coconut and freeze-dried berries. - Pairing Suggestions:
Fresh fruit slices like apples, pears, and strawberries pair beautifully with this fruity cheesecake ball. Grapes on skewers are another elegant option for serving.
Low-Sugar or Low-Calorie Cheesecake Ball
For a healthier option, this version of the cheesecake ball recipe offers all the flavor with fewer calories.
- Sweetener Substitutes:
Swap powdered sugar with stevia, erythritol, or monk fruit for a sugar-free version. This adjustment keeps the dessert sweet without adding unnecessary calories. - Mix-In Adjustments:
Skip the chocolate chips and add natural flavors like citrus zest or vanilla bean. Lemon zest, in particular, adds a refreshing brightness. - Coating Options:
Roll the cheesecake ball in finely chopped nuts, unsweetened shredded coconut, or almond meal for a low-carb finish. - Healthier Pairings:
For dippers, use fresh vegetables like celery or gluten-free crackers. For more healthy dessert inspiration, explore our Carrot Cake Recipe.
Perfect Pairings for Your Cheesecake Ball Recipe
Pairing the cheesecake ball with the right dippers can transform this dessert into a show-stopping experience. Therefore, it’s essential to consider the texture and flavor of your chosen dippers to complement the cheesecake ball recipe.
Classic Sweet Dippers
- Graham crackers are a timeless choice, offering a crunchy contrast to the creamy cheesecake.
- Vanilla wafers and shortbread cookies are also ideal, as their buttery flavor enhances the richness of the dessert.
- For added decadence, consider chocolate-dipped pretzels or biscotti.
Fruity Additions
- Fresh fruit slices like apples, pears, and strawberries are perfect companions for a fruity cheesecake ball.
- For an elegant touch, include skewered grapes or slices of pineapple on your platter.
Unexpected Choices
- Lightly salted pretzels or crackers add a delightful savory twist to balance the sweetness of the cheesecake ball.
- For brunch-inspired pairings, serve with mini pancakes or waffles.
By choosing the right dippers, you’ll enhance the flavors of this dessert cheese ball and create a memorable experience for your guests.
Holiday-Themed Cheesecake Balls
Christmas Edition
- Add peppermint extract (½ teaspoon) to the cheesecake mixture for a festive holiday flavor.
- Coat the ball in crushed candy canes or red and green sprinkles.
- Drizzle white chocolate over the top to create a “snowy” effect.
Halloween Edition
- Add orange food coloring to the cheesecake mixture for a Halloween-themed dessert.
- Coat with black sprinkles or crushed chocolate cookies.
- Decorate the serving platter with candy pumpkins or gummy worms for a spooky vibe.
Easter Edition
- Use pastel-colored sprinkles or crushed white chocolate for a spring-inspired coating.
- Garnish the platter with edible flowers or mini chocolate eggs for a festive look.
Savory Cheesecake Ball Twist
For those who prefer savory snacks, try this twist on the classic cheesecake ball recipe.
- Ingredients:
Omit the powdered sugar and vanilla extract. Instead, mix cream cheese with shredded cheddar, a pinch of garlic powder, and finely chopped chives or crumbled bacon. - Coating Options:
Roll the savory ball in crushed pretzels, toasted sesame seeds, or chopped fresh herbs. - Serving Suggestions:
Serve with crackers, crusty bread, or vegetable sticks for a flavorful appetizer.
Advanced Tips and Tricks for Cheesecake Ball Success
Creating the perfect cheesecake ball recipe is simple when you follow these expert tips:
Mastering the Texture
- Always use softened cream cheese. For example, cold cream cheese is difficult to blend and may lead to lumps in the mixture.
- If the mixture feels too soft, add more powdered sugar (1–2 tablespoons at a time) until it firms up.
Shaping Like a Pro
- Wrap the cheesecake mixture tightly in plastic wrap and twist the ends to create a compact shape.
- If cracks appear, let the mixture sit at room temperature for 10 minutes before reshaping.
Ensuring an Even Coating
- Roll the ball gently in the coating of your choice, pressing lightly to ensure it sticks evenly.
- For a layered coating, refrigerate the cheesecake ball between layers for 15 minutes to allow each layer to set properly.
Presentation Tips
- Keep the cheesecake ball chilled until just before serving to maintain its structure.
- Arrange dippers around the cheesecake ball on a decorative platter for an appealing presentation.
Frequently Asked Questions (FAQs)
1. Can I make the cheesecake ball recipe ahead of time?
Yes, this cheesecake ball recipe is perfect for preparing in advance. Make it 1–2 days ahead, but apply the coating just before serving to keep it fresh.
2. How do I store a cheesecake ball?
Wrap the cheesecake ball tightly in plastic wrap and store it in an airtight container in the refrigerator. It will stay fresh for up to 3 days.
3. Can I freeze the cheesecake ball?
Yes, this cheesecake ball recipe freezes well for up to one month. Wrap it tightly in plastic wrap and place it in a freezer-safe container. Thaw it in the refrigerator overnight before serving, and add the coating after thawing.
4. What are the best dippers for a cheesecake ball recipe?
Sweet dippers like graham crackers, vanilla wafers, and shortbread cookies are great options. For a fruity twist, try apple slices or strawberries.
5. Can this recipe be made gluten-free?
Absolutely! Substitute graham crackers with gluten-free alternatives, and check that all other ingredients are gluten-free as well.
6. What’s the origin of cheese balls?
Cheese balls, both savory and sweet, have been a staple of party tables for decades. While the savory version has a longer history, sweet variations like this cheesecake ball recipe have become increasingly popular. For more on the history of cheese balls, check out this Wikipedia article.
Conclusion: Your Perfect Cheesecake Ball Awaits
In conclusion, this cheesecake ball recipe is more than just a dessert—it’s a versatile, crowd-pleasing centerpiece. Whether you stick to the classic version or experiment with creative variations, it’s a guaranteed hit for any occasion.
Now it’s your turn to try this cheesecake ball recipe! Gather your ingredients, follow the simple steps, and let your creativity shine. As a result, you’ll create a dessert that’s not only delicious but also unforgettable. Don’t forget to share your version with friends and family. Happy cooking!
3 thoughts on “The Ultimate Cheesecake Ball Recipe”