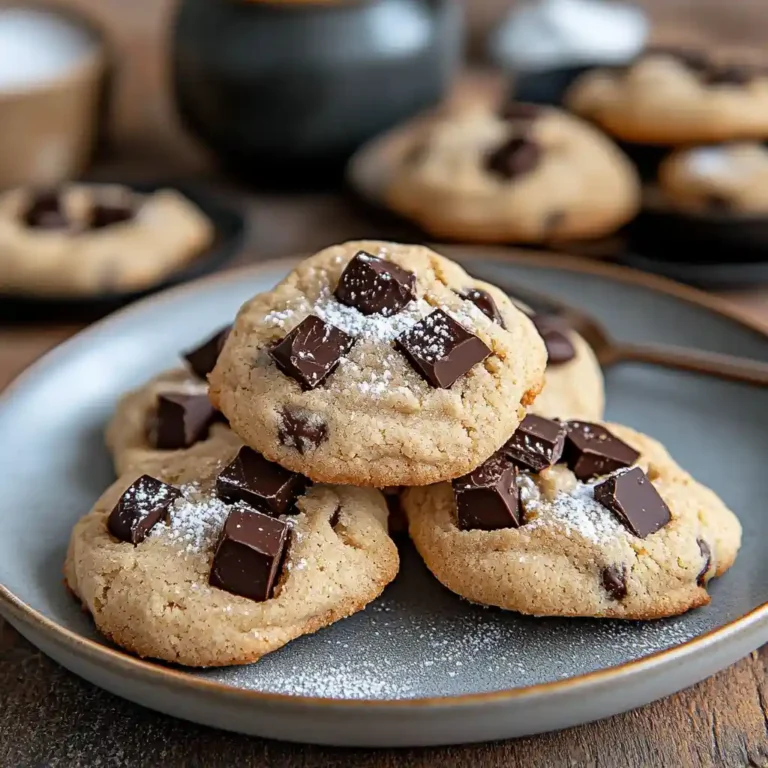
I’ve always believed treats should bring joy without compromise. After months of testing, I’m thrilled to share a recipe that delivers classic chocolate chip goodness with a mindful twist. These golden-brown bites are soft, chewy, and loaded with just the right amount of sweetness to satisfy everyone at the table.
Creating this Low Sugar Chocolate Chip Cookies was a labor of love. My family’s feedback—especially from my husband, who’s famously picky about desserts—helped refine every batch. We aimed for a balance between wholesome ingredients and that irresistible texture you crave. The result? A crowd-pleaser that even earned nods from friends during weekend bake-offs.
What makes these stand out? They’re designed to be guilt-free yet indulgent. Think crispy edges with tender centers, packed with melty morsels. I’ve also included tips for gluten-free variations, so no one misses out on the fun. Whether you’re baking for lunchboxes or a cozy afternoon snack, this recipe adapts effortlessly.
Key Takeaways
- Perfectly balanced recipe with reduced sweetness but full flavor
- Family-tested to ensure kid-friendly appeal
- Soft, chewy texture with crispy edges every time
- Flexible ingredients for dietary needs, like gluten-free options
- Simple techniques for consistent results, even for beginners
Ingredients and Preparation
The secret to perfect baked goods lies in careful selection. After testing countless combinations, I’ve curated a lineup of pantry staples that deliver flavor without excess sweetness. Let’s break down what you’ll need and how to work with these elements.

Building Blocks for Better Bites
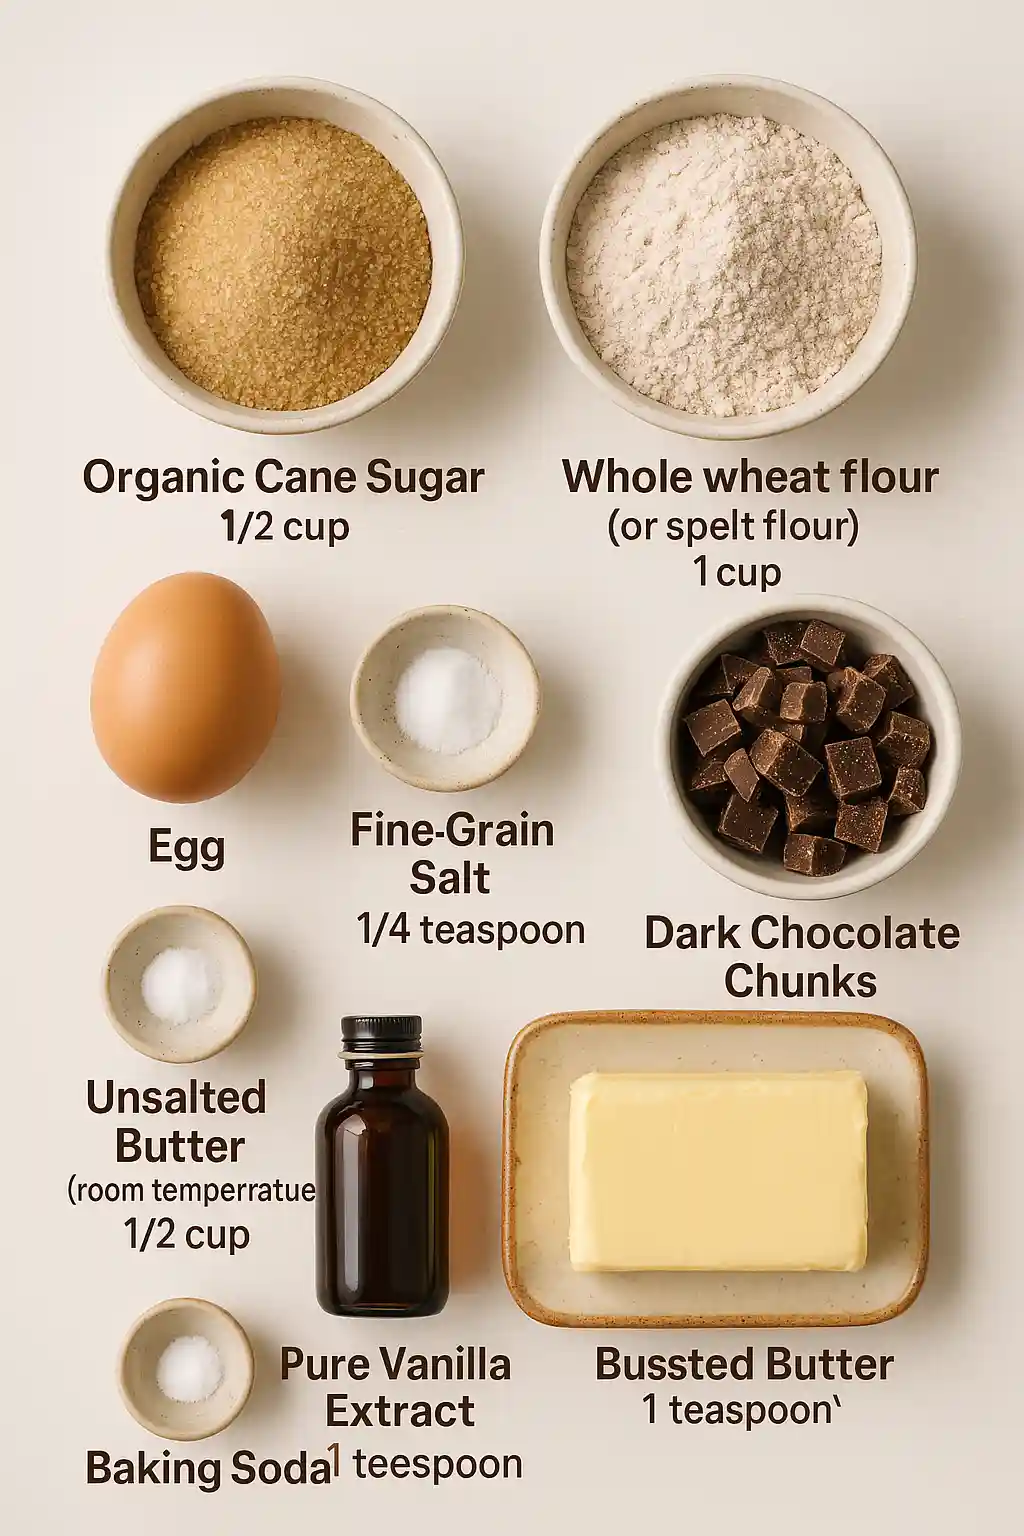
My recipe relies on seven core components:
- Organic cane sugar – Adds subtle caramel notes while keeping sweetness mild
- Whole wheat flour – Provides fiber and nuttiness compared to refined varieties
- Baking soda – Creates air pockets for that ideal rise and crackly surface
- Dark chocolate chunks – Melts into rich pools that balance the dough’s earthy tones
Quality vanilla extract is non-negotiable here – it amplifies warmth without overpowering. I prefer brands without artificial additives for cleaner flavor.
Precision Meets Flexibility
Accurate measurements ensure consistent results. When working with flour, always spoon it into your cup and level with a knife. Packed flour leads to dense, dry results – we want chewy centers!
Need swaps? Try these:
- Coconut sugar instead of cane for deeper molasses undertones
- Spelt flour for a lighter texture than whole wheat
- Brown sugar alternatives (avoid ones with allulose for best texture)
Remember: Ingredients at room temperature blend more smoothly. Cold butter? Grate it with a cheese grater for instant softness!
Step-by-Step Baking Process
Great baked goods start with precision and patience. Let me walk you through my foolproof method that creates treats with that irresistible balance of crisp edges and pillowy centers.

Mixing and Chilling the Dough
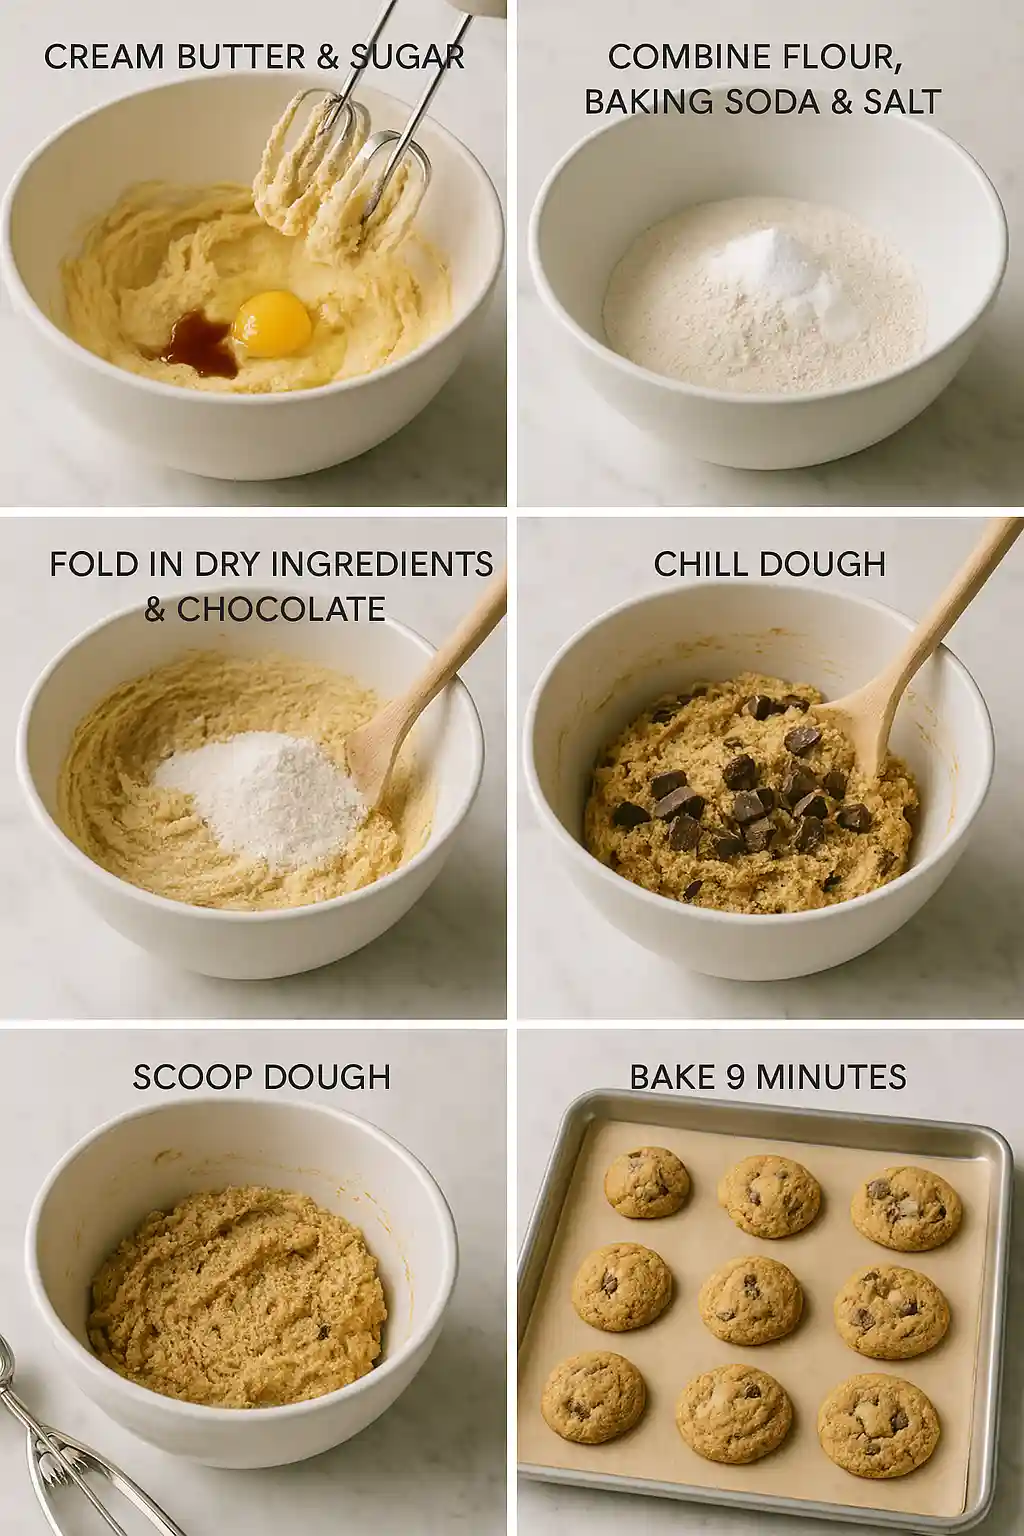
Begin by creaming room-temperature butter with your sweetener until fluffy. This creates tiny air pockets for lift. Add one egg and pure vanilla, mixing until smooth. Here’s my secret: stop the mixer before fully incorporating – finish blending with a spatula to prevent tough results.
Gently fold dry ingredients into the wet mixture. Overworking develops gluten, which means dense bites. Once combined, chill the mixture for 20 minutes. This rest period lets flavors meld and prevents flat disks in the oven.
Baking and Cooling Techniques
Preheat your oven to 350°F while portioning dough. Use a cookie scoop for even sizing. Bake for 9 minutes – they’ll look underdone, but that’s intentional. Residual heat continues cooking them as they cool on the sheet.
Wait 15 minutes before transferring to a rack. This patience pays off with chewy centers and crisp bottoms. For extra texture contrast, lightly press extra morsels into warm treats right after baking.
Tips and Tricks for Perfect Cookies
Perfecting cookies is all about attention to detail. Through trial and error, I’ve discovered small adjustments that make big differences in texture and taste. Let’s explore how to sidestep common errors while boosting flavor and consistency.
Mastering the Fundamentals
Stick to the recipe like it’s your baking bible. Even minor substitutions can alter chemistry – I learned this after a disastrous batch with expired baking soda. Measure dry ingredients in a flat-rimmed bowl, leveling with a knife for precision. Too much flour? You’ll get hockey pucks instead of tender bites.
Always preheat your oven fully – I wait until the indicator light clicks off. Cold sheets cause uneven spreading, so I keep extras in the freezer. Rotate pans halfway through baking for uniform browning. That golden edge? It happens when you pull them out at 9 minutes, not 10.
Here’s what separates good from great:
- Mix until just combined – overworked dough turns tough
- Use fine-grain salt to evenly distribute flavor without crunch
- Chill dough if your kitchen’s warm (above 75°F)
Balancing salt might seem odd in sweets, but it’s the secret weapon. A pinch enhances caramelization and tames bitterness from dark chocolate. Trust me – your taste buds will thank you.
A handy tip? Rotate your baking pans halfway through for even browning. And if you’re feeling adventurous, why not check out our take on a different dessert? Our Cosmic Brownies are another crowd favorite for those times when you need a little extra chocolate magic.
Creative Variations for Healthy Cookies
Baking becomes an adventure when you start playing with flavors and textures. The base recipe shines on its own, but these clever tweaks let you craft something uniquely yours. Let’s explore how simple swaps and additions can transform every batch into a new experience.
Flavor Boosters That Delight
Nuts add satisfying crunch and earthy depth. Try toasted walnuts for richness or pecans for buttery notes. Coconut lovers can mix in unsweetened flakes – they toast beautifully during baking, creating golden specks of tropical flavor.
Chunks of dark or milk morsels offer exciting contrasts. For a marbled effect, fold in two types simultaneously. Want something unexpected? A pinch of cinnamon or cardamom pairs wonderfully with vanilla’s warmth.
Ingredient Swaps Made Simple
Alternative flours open doors for dietary needs. Spelt gives a lighter crumb, while oat flour adds chewiness. Almond flour creates dense, moist centers – perfect for gluten-free versions. Just remember: these absorb liquids differently, so adjust quantities slightly.
Sweetener experiments can redefine your treats. Maple syrup introduces caramel undertones, and honey adds floral complexity. For vegan batches, flax eggs bind ingredients without altering taste. Each change brings its own personality to the classic formula.
Don’t shy away from extracts like almond or orange zest. They’re fantastic for hiding any “healthy” aftertaste kids might notice. The best part? These variations keep the soul of the original while letting creativity run wild.
Mastering low sugar chocolate chip cookies
Perfecting these treats became my obsession. Through 47 test batches, I discovered three game-changing techniques that transform decent dough into showstopping creations. Let me walk you through my hard-won insights.
Distribution matters more than quantity. I use a kitchen scale to measure morsels – 85g gives ideal coverage without overwhelming the dough. Fold them in last, using a gentle scoop-and-lift motion. This prevents color bleed and keeps those melty pockets intact.
Quality ingredients make all the difference. After testing seven brands, I found that thicker-style pieces hold their shape better during baking. They create satisfying texture contrasts against the chewy base. For chip cookie variations, try mixing mini and standard sizes – it layers flavor beautifully.
My biggest aha moment? Letting dough rest overnight develops deeper caramel notes. If you’re short on time, freeze scooped portions for 30 minutes before baking. This prevents spreading and ensures crisp edges with pillowy centers.
For those looking to experiment, consider swapping in coconut sugar for a deeper molasses undertone, or try spelt flour for a lighter texture. If you’re in the mood for more cookie experiments, you might also want to try our Healthy Oatmeal Cookies or even our Protein Cookies for an extra nutritional punch.
Common pitfalls solved:
- Dry dough? Add ½ tsp milk
- Flat results? Check expiration dates on leavening agents
- Uneven baking? Rotate pans at the 5-minute mark
Remember, ovens vary. Start checking at 8 minutes – perfect doneness happens fast. With these tweaks, you’ll nail that bakery-quality bite every time.
Serving, Storing, and Enjoying Your Cookies
The real magic happens after the oven timer dings. How you handle your baked goods determines whether they stay fresh for days or turn into hockey pucks. Let’s make every bite count with smart storage solutions that preserve texture and flavor.

Chewy Versus Crispy Preservation
Love soft centers? Store cooled treats in airtight containers with a folded parchment layer. Add a slice of bread to maintain moisture – it works like magic for 3-4 days. Prefer crunch? Use glass jars instead. The rigid walls prevent humidity buildup while letting air circulate.
Portion control matters. I use a 1/4 cup scoop to divide batches into single servings before freezing. This trick prevents overindulgence and keeps dough ready for impromptu baking sessions. Simply thaw frozen portions on your counter while preheating the oven.
Pairing ideas elevate the experience:
- Morning pick-me-up: Dunk in steaming coffee
- After-school snack: Serve with chilled milk
- Dessert upgrade: Crumble over vanilla ice cream
These methods work beautifully for other recipes too. Adapt them to oatmeal-based versions or nutty variations. Remember, proper storage means you’ll always have fresh-baked goodness within reach – no compromise on taste or texture.
Conclusion
Creating this recipe taught me that small changes can lead to big flavor. Through countless trials, I discovered how subtle swaps—like using brown sugar for moisture or a pinch of soda for lift—transform classic treats into wholesome delights. Even quality extract plays a starring role, adding aromatic depth without overpowering.
What began as a kitchen experiment became a family favorite. Friends now request these for gatherings, proving mindful baking doesn’t mean sacrificing joy. The secret? Balancing smart ingredients with techniques that preserve that irresistible chew.
I encourage you to make this recipe your own. Try nutty variations or swap in different extracts. Share your twists online—I’d love to see your creations! With each batch, you’ll master the art of crafting treats that satisfy cravings while aligning with your goals.
Remember: Great baking isn’t about perfection. It’s about the smiles around your table and the pride in nailing that perfect bite. Preheat your oven, grab that mixing bowl, and let’s keep the tradition alive—one delicious discovery at a time.

Low Sugar Chocolate Chip Cookies Recipe
Equipment
- Mixing bowls
- Hand or stand mixer
- Spatula
- Cookie scoop
- baking sheet
- Wire rack
- Oven
- Measuring Cups and Spoons
Ingredients
Ingredients
- 1/2 cup organic cane sugar or substitute coconut sugar
- 1 cup whole wheat flour or use spelt flour for lighter texture
- 1/2 teaspoon baking soda
- 1 large egg
- 1/2 cup unsalted butter room temperature
- 1 teaspoon pure vanilla extract quality brand without artificial additives
- 85 grams dark chocolate chunks or use a mix of mini and regular chips
- 1/4 teaspoon fine-grain salt
Instructions
- Preheat your oven to 350°F (175°C).
- In a mixing bowl, cream room-temperature butter with cane sugar until fluffy using a mixer.
- Add the egg and vanilla extract, mixing until almost combined. Finish mixing with a spatula.
- In a separate bowl, combine flour, baking soda, and salt. Gently fold dry ingredients into wet mixture without overmixing.
- Fold in chocolate chunks using a scoop-and-lift motion.
- Chill the dough for 20–30 minutes to firm up and prevent spreading.
- Portion dough using a cookie scoop onto a lined baking sheet.
- Bake for 9 minutes. Cookies will appear slightly underdone.
- Cool on the baking sheet for 15 minutes before transferring to a wire rack.
- Optional: Press additional chocolate chunks into warm cookies after baking for extra texture.
Notes
Nutrition
FAQ
Can I swap all-purpose flour for a gluten-free option?
Absolutely! I’ve had great results using almond flour or oat flour. Just keep the ratio 1:1 and add a teaspoon of xanthan gum if your blend doesn’t include it. The texture stays soft and chewy!
How do I keep my treats soft without adding extra sweeteners?
My trick is using mashed ripe bananas or unsweetened applesauce. They add natural moisture and a subtle sweetness that pairs perfectly with dark chunks. Store them in an airtight container with a slice of bread to lock in softness.
What’s the secret to preventing my dough from spreading too thin?
Chilling the mixture for at least 30 minutes before baking is key. I also use cold butter and avoid overmixing. If you’re in a hurry, pop the shaped rounds into the freezer for 10 minutes—works like magic!
Can I add mix-ins like walnuts or shredded coconut to the recipe?
Definitely! Toss in a handful of chopped pecans, sunflower seeds, or unsweetened coconut flakes. Just make sure they’re finely chopped so little hands (or picky eaters) won’t notice the texture shift.
How long will these stay fresh, and what’s the best way to store them?
They’ll keep for up to 5 days at room temperature in a sealed tin. For longer storage, freeze the baked goods in a zip-top bag. Reheat them in the toaster oven for that just-baked crispness!
